Thursday, March 3, 2011

Egg Sandwich- Making use of: Left Overs

There was still some Mix left over from making those Pot Stickers. So this morning, I decided to use it in an egg sandwich, or an omelet.

Ingredients:

  • Egg Whites (I just poured it from the box of Egg Whites), you may also use 2 Large eggs, that have been whipped a bit.
  • 3-4 Tbsp of Pot Sticker Mix (Approx)
  • 1 tsp Grapeseed Oil

Get Started:

  • Place non-stick pan on MED heat, add the oil.
  • When pan is hot, pour eggs into the pan.
  • Using a spoon or you hands put the MIX on one half of the pan.


  • When the egg is just about solid on the clean side, it's time to use a flat spatula, and fold over the egg on top of the MIX, let cook for another minute.
  • You may leave it as it, and have an Omelet, or you may cut it in half, using the spatula, and stack then into a small bun, toast, whatever you like.

Here's mine


Secret Chocolate Mousse

I Loved this type chocolate mousse ever since I had it in a torte with fresh raspberries. I've changed it up by having it in a cup with my choice of pureed fruit. Take note that the fruit you want to use for this recipe cannot be too watery. For example, you may use mashed Bananas, pureed Mangoes, or decide to layer using whole berries of any kind, or halved cherries, or just chopped up strawberries, mangoes, etc...
Ideally a small glass or espresso cup can be used. I had to use my coffee cups but they were too big.
This dish is best served cold.


Ingredients:
  • 1 pk Soft Tofu (340g), smoothed down (use hand blender or a whisk)
  • 100g Dark Chocolate, chopped
  • 2 Ripe Mangoes, chopped and pureed (use hand blender)

Get Started:

  • PREP: First chop then puree the Mangoes, place in a bowl, set aside.
  • Open the box of Tofu, and release any extra liquid. Place into a new bowl, and use whisk or hand blender to smooth out. Set aside.
  • Chop the Chocolate, place into a microwavable bowl. Set the microwave timer for 1 minute on high. Place the bowl in the microwave. Stop the Microwave every 10 seconds or so to stir about the chocolate using a spoon. We want to have the chocolate evenly melted. Once chocolate has melted completely, set aside to cool off a bit.
  • When Chocolate is warm, start to pour the Tofu inside a small bit at a time, (approx 1-2 Tbsp), and mix it well into the chocolate until completely blended. As the mixture turns out lighter, you may add more with each addition.
Now we're ready to Plate!

  • In a small glass/cup, First add the puree, to fill half the cup.
  • Then spoon in the Chocolate mousse to fill the other half.
  • You may decorate your glass with a piece of fruit that you used, to hint at what is underneath the chocolate, or Mint leaf, and/or chopped chocolate pieces.

Here they are!


Stir Fried Kale

This recipe is a super nutritious side dish to almost any meal. Kale is a mighty healthy form of cabbage that's high in Anti-Oxidants, Vitamin C and Calcium, amongst other things. I've finally found this curly, leafy vegetable at the Health Food store, Avril, down by the 10/30 in Brossard. I've paired up this dish with chopped Garlic Stem and Ginger.

Kale


Garlic Stem


Ingredients:

  • 2 bunches of Kale, De-Stemed, coarsely chopped
  • 1 inch piece of Ginger, chopped
  • 2 Garlic Stems, chopped
  • 1Tbsp sesame Oil

Get Started!

  • PREP: Wash the Kale, remove the stems as you would Spinach stems, (hold down the leaves in one hand, and rip off the stems with the other hand).
  • Coarsely chop the Kale, you may cut them into big pieces as they will wilt once cooked.
  • First slice the Garlic Stems, as they are very long. Then chop them. Chop the ginger.
  • Heat non-stick pan on MED heat. Add the oil, kale, ginger and garlic stem.
  • Stir-Fry, until Kale is Tender, yet still a bit crunchy (taste it), It's OK that it gets a bit golden from the stir fry.
  • Note: If you do not have Garlic Stem (found in Asian stores), you may use a clove of garlic instead.

Here, I paired the Kale next to the Pot Stickers


Shrimp and Shiitake Mushroom Pot Stickers

Everyone, this is by far my fave recipe to date. This is really fun, it does take time to make, and the results will more than please your guests. I've just been down to KIM PHAT again, that Asian Market in Brossard. I picked up some Wonton skins, Shiitake Mushrooms, Thai Basil and Shrimps. I also checked out that new Health Food store, Avril, down by the 10/30 shopping area. There I picked up some Light Tamari soy sauce. The soy sauce, the shrimp, basil and mushrooms to be the real staple that gives the amazing Asian flavours that keep you wanting more!


Ingredients:


  • 1 pk Shiitake Mushrooms (255g), Sliced
  • 2 cups Napa Cabbage, thinly sliced
  • 1 Jalapeno pepper, chopped
  • 1 Tbsp Tamari soy sauce
  • 1 Tbsp Sesame Oil


  • 800g 60-70 Shrimps
  • 1 tsp Tamari soy sauce
  • 1 pk Wonton Skins (12 oz, approx 44 sheets)
  • 8 Thai Basil Leaves, thinly sliced


Get Started!


In advance:  You must take out the Wonton skins and the bag of Shrimps from the freezer to defrost.


  • PREP: chop the Jalapeno pepper, slice the mushrooms, slice the cabbage.
  • Heat non-stick pan on MED heat and add the sesame oil.
  • Add the PREP the the heated pan. You will notice that the mushrooms are very spongy and will suck up all oil in the pan.
  • Stir- Fry the contents in the pan. The cabbage should be wilted, and mushrooms turning golden. Here is when you'll add the Tamari Soy sauce.
  • Mix together, and remove from heat after a few minutes.
  • remove from heat and set aside in a medium sized bowl.


  • PREP: Remove the tails from the shrimp. Squeeze out excess water. NOTE: you may use cooked shrimp or raw, it's up to you. Keep in mind to make sure shrimp are De-veined and De-shelled before cooking.
  • Heat non-stick pan on MED heat.
  • Add the shrimp to heated pan.
  • Add the Tamari soy sauce once shrimps are pink. Note: IF using cooked shrimps, you do not need to cook these very long, only until they get hot.
  • Remove from heat, and if there is excess of water in the pan, you may rid of it. We only need to use the shrimp.
  • On a cutting board, cut each shrimp into about 4 pieces.
  • Once cut, add the the Mushroom mix.
  • Slice the Thai Basil, add to the mix, and stir evenly.
Assembling the Wontons:
  • Place Wonton sheets on a clean surface or cutting board. You place as many as you can fit.
  • Using a fork, place a small amount of the mix into the middle of each sheet.


  • Next, have a small bowl of water nearby. Wet your fingers, and wet all four edges of the sheet. Keep in mind to always have your finger wet.
  • To make the Pot Sticker shape; take two opposite corners and pinch them together. While holding it up, take one more corner to the top and pinch. You will notice the shape of a square forming. Pinch the sides of the sheet that come together the seal it shut. Now you may do the same thing to the remaining corner left.
  • Your Pot Sticker should look like this:


  • It is OK to have your Pot Sticker shiny from the water. It is important to wet the tops and sides with your fingers, as you do not want them to look dried out after cooking.
  • Next, Once you have your Pot Stickers ready to cooking, Heat a non-stick pan, which also has a lid that fits on top to LOW-MED heat, add about 1 Tbsp of grapeseed oil to the pan.
  • Once pan is heated, add the Pot stickers, and Cover the pan.
  • Be careful to keep an eye on them, as you want the bottoms to brown, but not burn. NOTE: If it is possible to make all the Pot Stickers prior to start cooking them, do so. You will save yourself from being distracted and burnt Pot Stickers.
  • Remove from heat once they have golden brown bottoms, and set on a plate.
  • I like to serve them with Thai Sweet Red Chili Sauce, which can be found at Costco and Asian stores, or Asian section of grocery stores.

Here they are!


Tofu Snack

This recipe is very simply and has a kick of flavour. For all those not too keen on Tofu, I recommend to try it, as I'm sure most have not tried Tofu this way before. This crispy Tofu snack will leave you wanting more, and satisfy your hunger.

Ingredients:

  • 1 pk of Firm Tofu (300g)
  • 1 Tbsp Grapeseed Oil
  • 1 tsp Tandoori spice

Get started!

  • Heat a non-stick pan on MED heat, add the Oil.
  • Cut the block of Tofu in half width-wise. Cut each half-piece length-wise in half. You should have 4 flat square pieces now. Cut those into 4 equal parts. They will look like rectangular sticks.
  • Place the Tofu in the heated pan. Spinkle the Tandoori over the Tofu. Here you must stir around the Tofu in the pan in order to have all the Tofu coated.
  • Make sure that all the pieces of Tofu are flat side down on the pan. We want all sides of the Tofu to get nice and crispy.
  • After a few minutes the pieces should be ready to flip over. Do not flip them over until they are crispy. Make sure all four sides are crispy before removing them from the heat.

And That's all!
Here's how it turned out last night


Sunday, February 20, 2011

Hazelnut and Chocolate Chip Biscotti

Today I made two kinds of Biscotti. I wanted to make one that wasn't too sweet-the prevous recipe. And then I wanted something sweeter. Originally I wanted to make these guys totally chocolate, but I didn't have any cocoa powder, so keep in mind that adding 1/3 cup of Cocoa powder into the the dry mix should do it!


Preheat oven to 350 F

Ingredients:

  • 2 1/2 cups All Purpose Flour
  • 1 tsp Baking Powder
  • 1 cup packed Brown Sugar
  • 3 Large Eggs
  • 1 tsp Vanilla Extract
  • 3 Tbsp Grape seed oil
  • 1 cup semi-sweet Chocolate Chips
  • 1 cup whole roasted Hazelnuts


Here's what to do if you need to roast your hazelnuts:
Place them onto a baking sheet and into the preheated oven for 15 minutes. Remove from the oven and place them into a bowl lined with a peper towel. place another paper towel on top and roll about to get most of the skins off.
Now you're set!


Get Started:
  • In a large mixing bowl, add the Flour and Baking Powder and mix to evenly distribute the Baking Powder. Set aside.
  • In medium mixing bowl, add the Brown Sugar, Vanilla Extract and oil. Mix contents with a fork until well blended.  Then add the Eggs, and mix well.
  • Make a well in the large bowl. (like in the previous recipe). Add the liquid mixture to the well you made. Using your fork, stir from the center of the bowl, slightly touching the dry mixture to slowly incorporate them together. The mixture will become difficult to mix once most of the dry mixture is incorporated. Feel free to begin using your hands to finish mixing.
  • Once you have the dough sticking together, try not to over work it. I like to leave the dough in the bowl, and flatten it out a bit. I found this dough turn out to be quite sticky due to the amount of sugar it has.
  • Add the Hazelnuts and Chocolate Chips. This dough is on the sticky side it's easier to incorporate into the dough. Fold over the dough, and try to gently get them to stick inside the dough. I find that squeezing the ends a bit help to stick everything together. The Goal is to have your dough shape out to be like a log.
  • Have your baking sheet ready lined with parchment paper. You may substitute for a greased baking sheet.
  • Place the log on the baking sheet. You may flatten slightly, as it will rise a bit, and we do not want them to be round. We want it look slightly rounded, not flat.
  • Place baking sheet in the oven for 40 minutes.
  • Remove from the oven and place log onto a cooling rack. Let cool. Leave the oven turned on.
  • Once cooled off, place log onto a cutting board. Using a Chef's knife, slice the log width-wise into 1cm to 1.5cm strips
  • Place the biscotti pieces onto the baking sheet and place into the oven for 10 minutes.
  • Remove from oven, turn biscotti over, and place back in the oven for another 10 minutes.
  • Remove from the oven and place biscotti onto cooling rack. Let cool.


Here they are:


Enjoy!


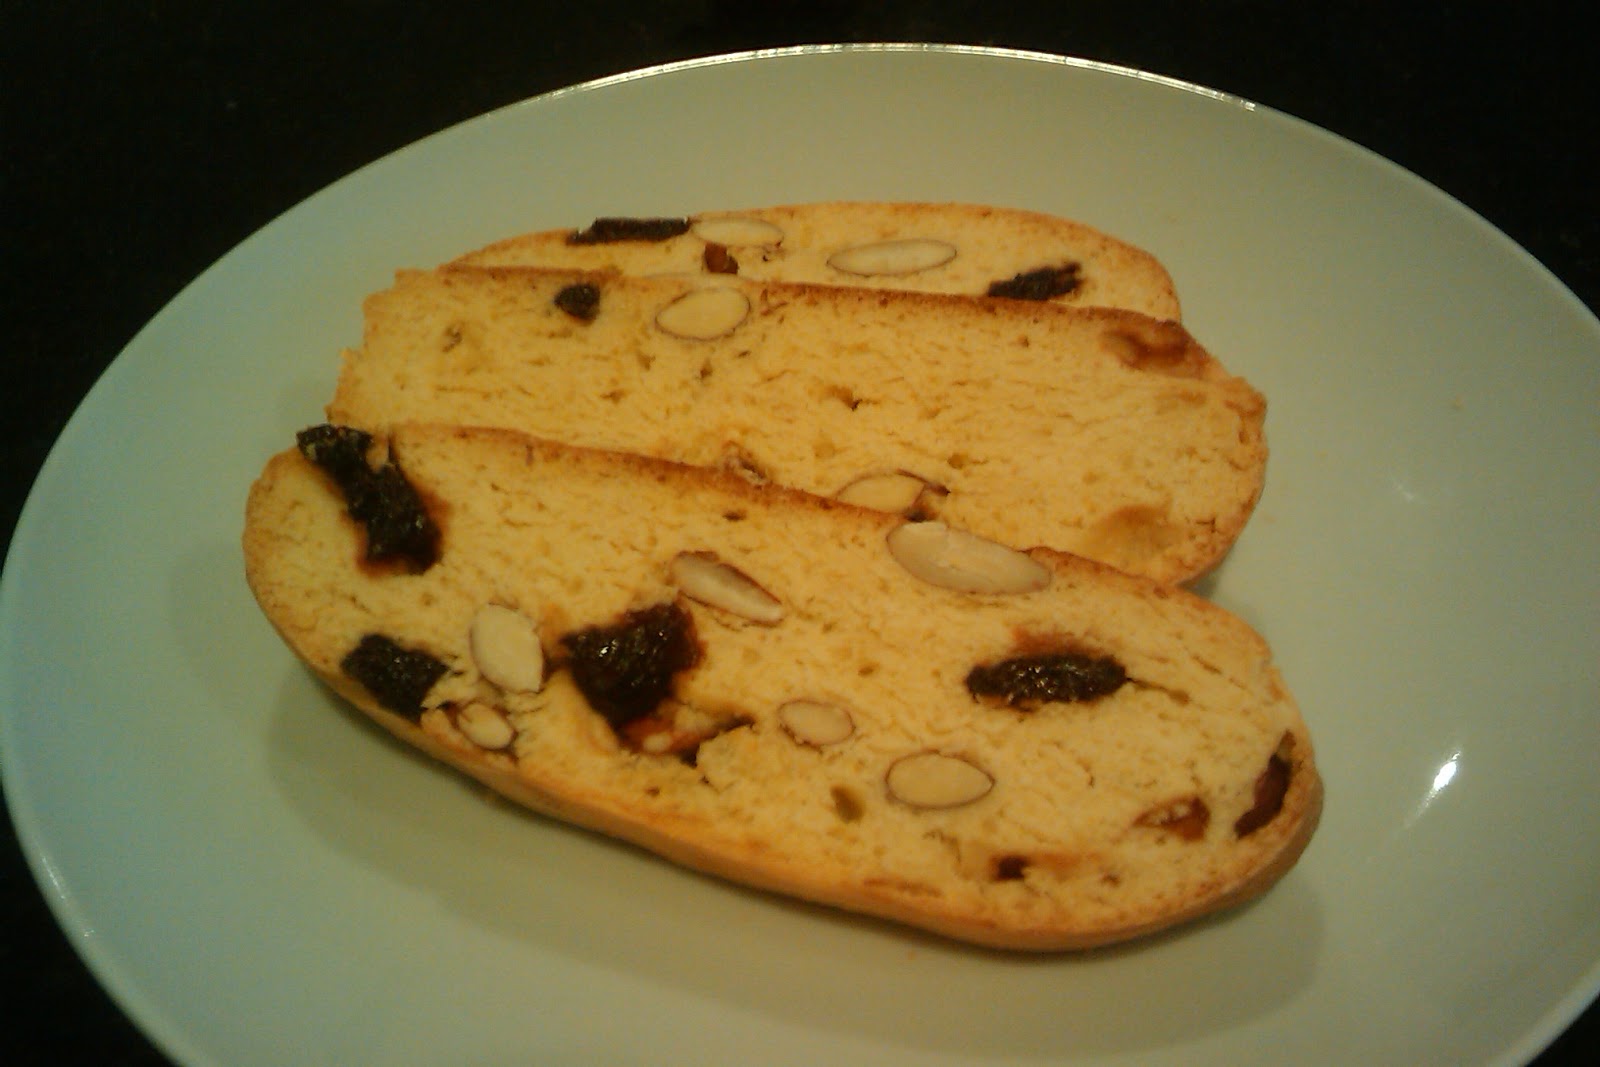
Dried Cherry and Almond Biscotti

This is my fave kind of cookie. Likely because I'm not a fan of those greasy chewy kinds, they are great, but just not for me. I always play around with this sort of recipe until I get it just right. And the great thing about this, is if you have a good base for the dough, you can change it up about any way you like.


Preheat oven to 350 F

Ingredients:

  • 2 cups All Purpose Flour
  • 1 tsp Baking Powder
  • 3 Large Eggs
  • 3 Tbsp Grape seed oil (use your preference)
  • 3 Tbsp Honey
  • 1 tsp Vanilla Extract
  • 1/2 cup Dried Cherries
  • 1 cup Whole Almonds

Get Started:

  • In a large mixing bowl, add the Flour and Baking Powder and mix to evenly distribute the Baking Powder. Set aside.
  • In medium mixing bowl, add the Eggs, Vanilla Extract, oil, and then the honey. Mix contents with a fork until well blended. TIP: when you use the oil before the honey with the same spoon the honey will easily slip off the spoon into the bowl!
  • Make a well in the large bowl. (what I mean is to spread the mixture away from the center of the bowl to make like a hole). Add the liquid mixture to the well you made. Using your fork, stir from the center of the bowl, slightly touching the dry mixture to slowly incorporate them together. The mixture will become difficult to mix once most of the dry mixture is incorporated. Feel free to begin using your hands to finish mixing.
  • Once you have the dough sticking together, try not to over work it. I like to leave the dough in the bowl, and flatten it out a bit.
  • Add the Cherries and almonds, and try your best to be patient, as those almonds don't really want to stay in there. Fold over the dough, and try to gently get them to stick inside the dough. You can fold it around a few times.Try not to break the dough. I find that squeezing the ends a bit help to stick everything together. The Goal is to have your dough shape out to be like a log.
  • Have your baking sheet ready lined with parchment paper. You may substitute for a greased baking sheet.
  • Place the log on the baking sheet. You may flatten slightly, as it will rise a bit, and we do not want them to be round. We want it look slightly rounded, not flat.
  • Place baking sheet in the oven for 30 minutes.
  • Remove from the oven and place log onto a cooling rack. Let cool. Leave the oven turned on.
  • Once cooled off, place log onto a cutting board. Using a Chef's knife, slice the log width-wise into 1cm to 1.5cm strips
  • Place the biscotti pieces onto the baking sheet and place into the oven for 10 minutes.
  • Remove from oven, turn biscotti over, and place back in the oven for another 10 minutes.
  • Remove from the oven and place biscotti onto cooling rack. Let cool.

Here are my Biscotti


Here they are with melted White Chocolate on top!
(If you have white chocolate to use-USE IT. it makes it that much better!)


Enjoy!